I’ve recently been working on a Google Apps Scripts (GAS) add-on for Sprintly that will allow our customers to directly integrate the Sprintly API into Google Spreadsheets. GAS is a little like Facebook Apps or Zendesk Web Widgets only for Google Apps in that you can code some JavaScript and HTML that Google will embed into the user’s browser.
The main problem with GAS is that, by default, you edit your scripts entirely in an in-browser editor within Google Apps. It’s a fine editor as far as in-browser editors go, but there’s absolutely no tooling – no mocha or chai for testing, no grunt or gulp, no eslint, etc. On top of this, your GAS code is “deployed” by Google via tagging versions of a what is effectively a Google Doc. In other words, there is no git push heroku or apt-get install my-code.deb.
After some tinkering I was able to get a reasonably sane build and deploy process built for our GAS add-on using the following tooling:
Unfortunately, the few tools I found for pushing code to GAS files on Google Apps weren’t working and appeared abandoned. In the end I created python-gas-cli to handle both authorizing your tooling and figuring out which files to “deploy” to a GAS file using the GDrive API.
After a little testing, I figured out that Browserify works just fine. GAS requires a Code.gs as an entry point to your GAS add-on. All I had to do to get Browserify working was make sure my output went into Code.gs. Easy enough.
Once I’d verified that Browserify Code.gs files would work within the GAS environment, a utility for “deploying” code to GAS files, and had my basic tooling in place locally on the CLI, it was just a matter of tying it all together in Travis-CI.
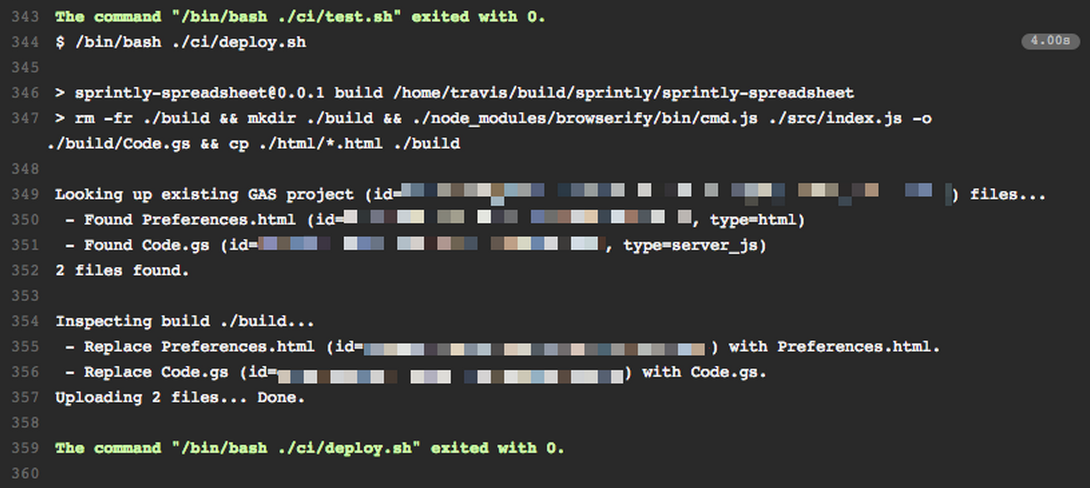
I’ve put together a gist that includes our travis.yml file and the related scripts that we’re using for our GAS CI environment. The basics of this process goes a little like:
- Run
eslintand our tests withmocha. - Use Browserify to build our
Code.gs. - Copy over any HTML files that need to be pushed with our
Code.gs. - Use
python-gas-clito “deploy” the build.
Once you have that wired in the only thing left to do is set up credentials using gas authorize locally and then add the credentials JSON file to your repository along with your OAuth2 client secrets file.
Oh, and don’t forget to git push this time around. ;)